Simple Closet Makeover Tips – 4 X MORE Storage Space
How I QUADRUPLED my storage in this small space
Do you have a “Monica Closet” (Like in Friends)?
You know the one that sends you diving through the air in slow motion shouting “NOOOO!” anytime it looks like someone is about to open the door.
Full disclosure: I might have a couple of these “Monica Closets.”
If you have a closet in your home that is NOT living up to its storage potential, then keep watching! In this video I will show you how I QUADURPLED my storage space!
Even to the point that I actually have extra space now!
Affiliate disclosure: Please note that some of the links within this site are affiliate links and I will earn a commission if you purchase through those links…which means that I can continue to bring you helpful content at no cost to you! I appreciate your support. Click here for full affiliate disclosure.
In This POST:
5 1/2 Tips for Maximizing and Organizing your closet space

Closet Makeover Video
Here’s a video I made about this closet makeover.
Floor plan Note:
If you have been considering the Century Oak Farmhouse floor plan, you may be wondering where this space is on the plan…It’s not. Remember, our home is slightly different from the plan we sell and this is one of those places.
Prepare yourself for the scary before shots.
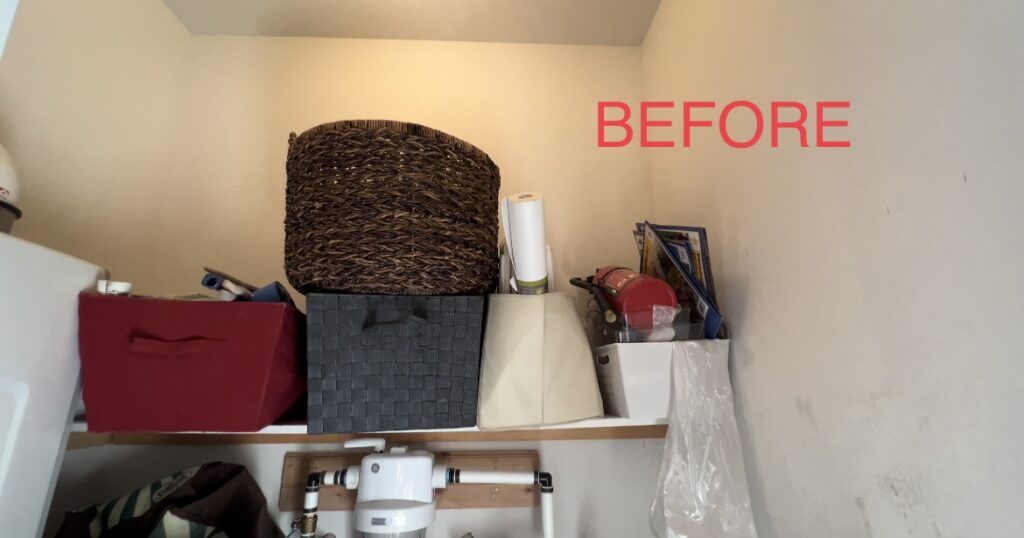
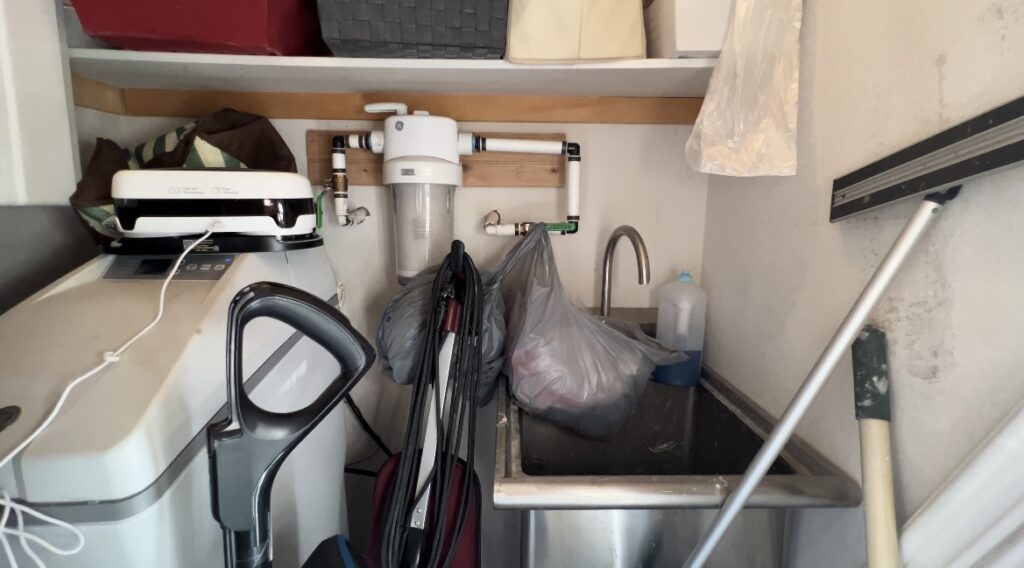
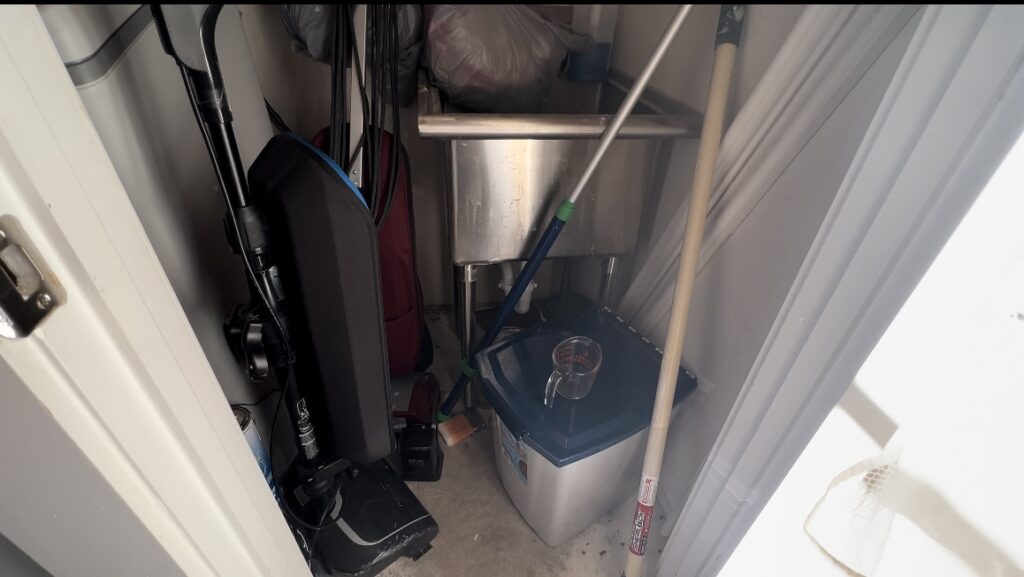
This space got no love or respect because it didn’t respect itself. It was JUST a mechanical closet, so nobody took the time to put things away properly in here.
Plus, there was no place TO put things away properly.
Even with all it’s weird obstacles to work around, I’ll quadruple the storage space in this closet and make it look good enough to demand a little respect!
This closet holds our water heater, a utility sink we use for cleaning paint brushes, a water softener and water filtration system.
There are wires and pipes everywhere and it’s never going to be a beautiful space, but with more shelves and storage solutions, it can certainly function much better.
My Plan of Attack for this closet makeover
My plan is to store ALL my cleaning supplies in this space: Vacuum, dust buster, mop, bottles of cleaning sprays, etc.
I’ll also need it to store the dog food container, gardening tools, and some bulk items from Costco.
I also have a few cleaning items that need to be charged when not in use, so I’ll need a convenient place for that as well.
This space is about 3.5’x 5’ and currently only has ONE shelf.
The first thing I will do is clear out everything I can and clean all the surfaces, including the yucky utility sink.
Next, I’ll add as many shelves as possible.
Build more shelves to maximize storage space
To build the shelves, I’m using 1x4s along 3 sides to support the shelf that will be nailed to the top side.
For the shelves, I’m using closet shelf boards from Home Depot.
They come primed and with a rounded front edge.
They were the cheapest option, and since this is a storage/mechanical closet, they will be just fine.
If this was a more highly visible space, I’d use plywood with 1×2 trim across the front edge instead.
I also added a couple of corbels, or brackets, in places where I couldn’t support the shelf on 3 sides, like next to the water heater.
Get vertical: Hanging Storage
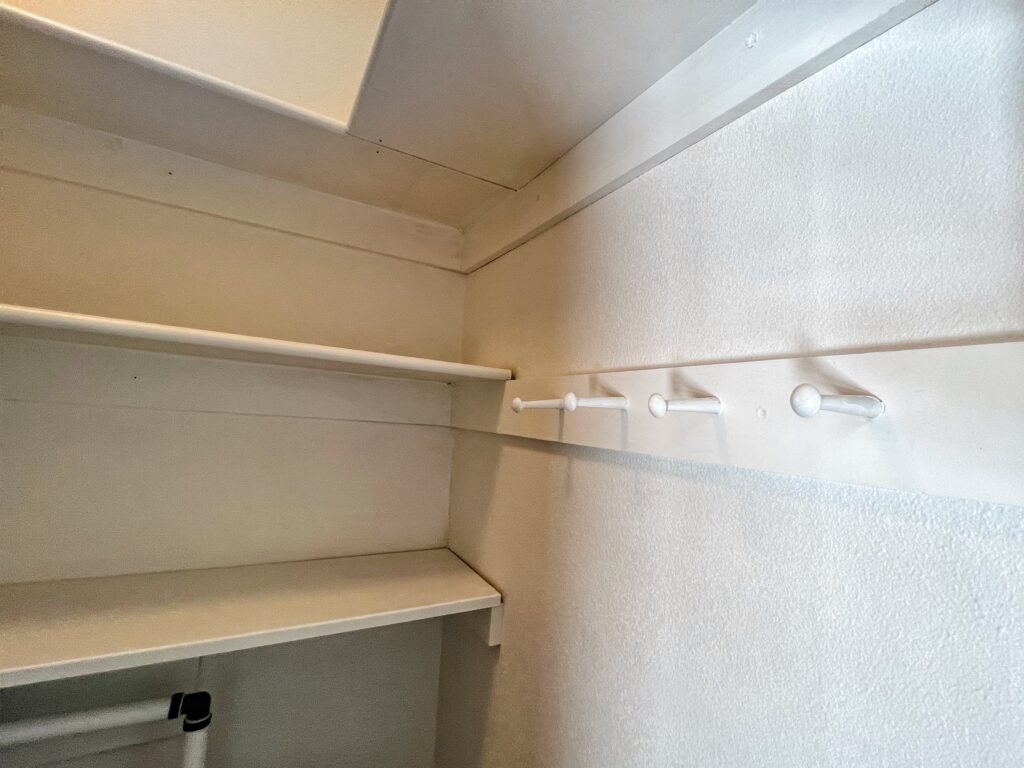
I have some items I’d like to hang in here, so I’m using a board with shaker pegs in a couple areas for those items.
To attach the shaker pegs, I used a spade bit to drill a hole the size of the peg, then used wood glue to secure them.
Let’s Organize this closet
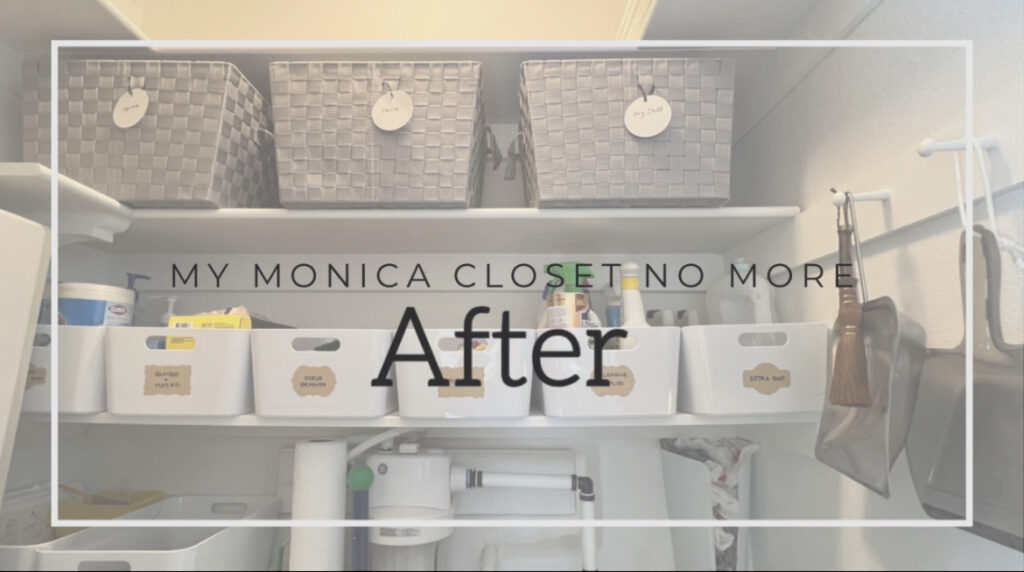
Now, it’s time to organize and fill these shelves!
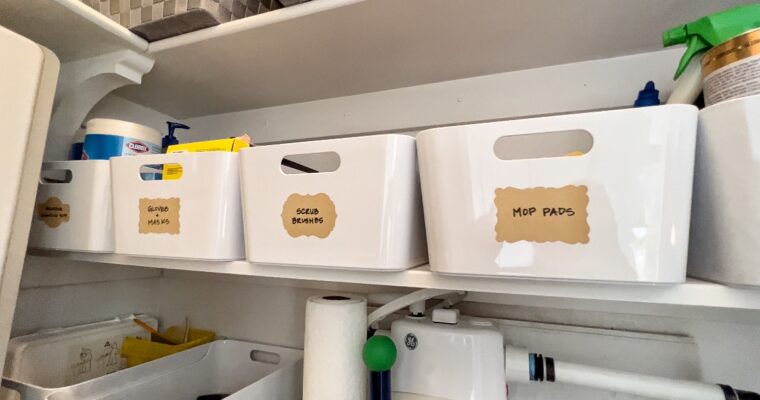
I’ll link my storage boxes below.
I use the smaller, easier to reach boxes for items I need to access the most.
Before I installed the shelf for the charging station, I made sure my vacuum would fit below.
I will need a step stool to reach the second and third shelves, so I put items I need more occasionally in those bins and the top shelf is for bulk and backstock items.
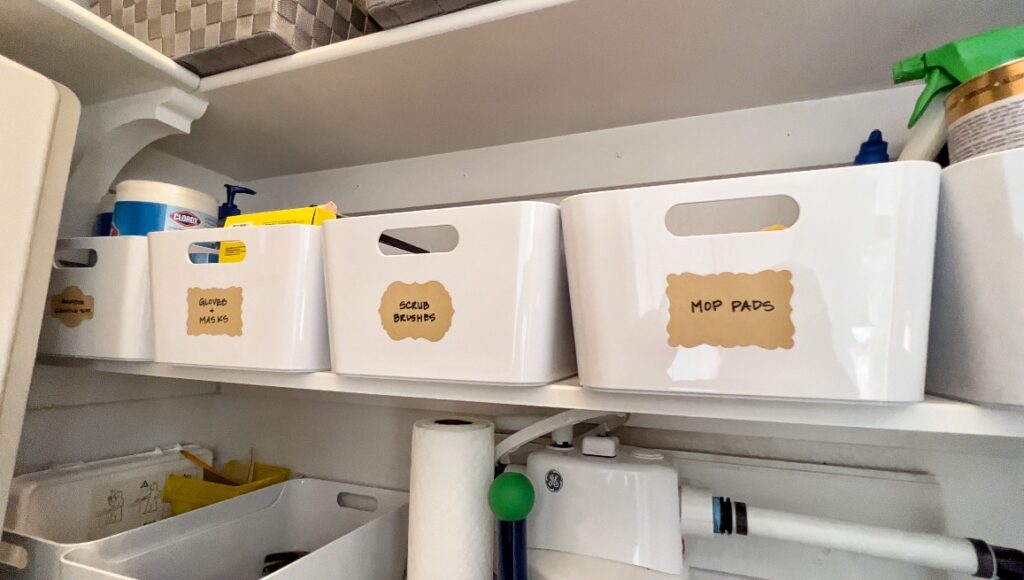
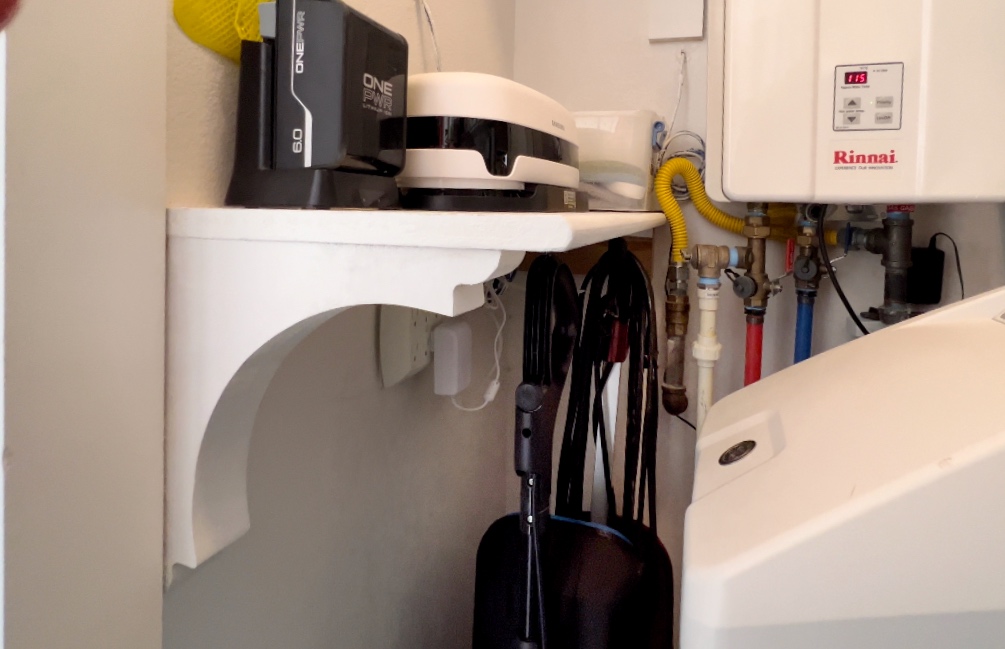
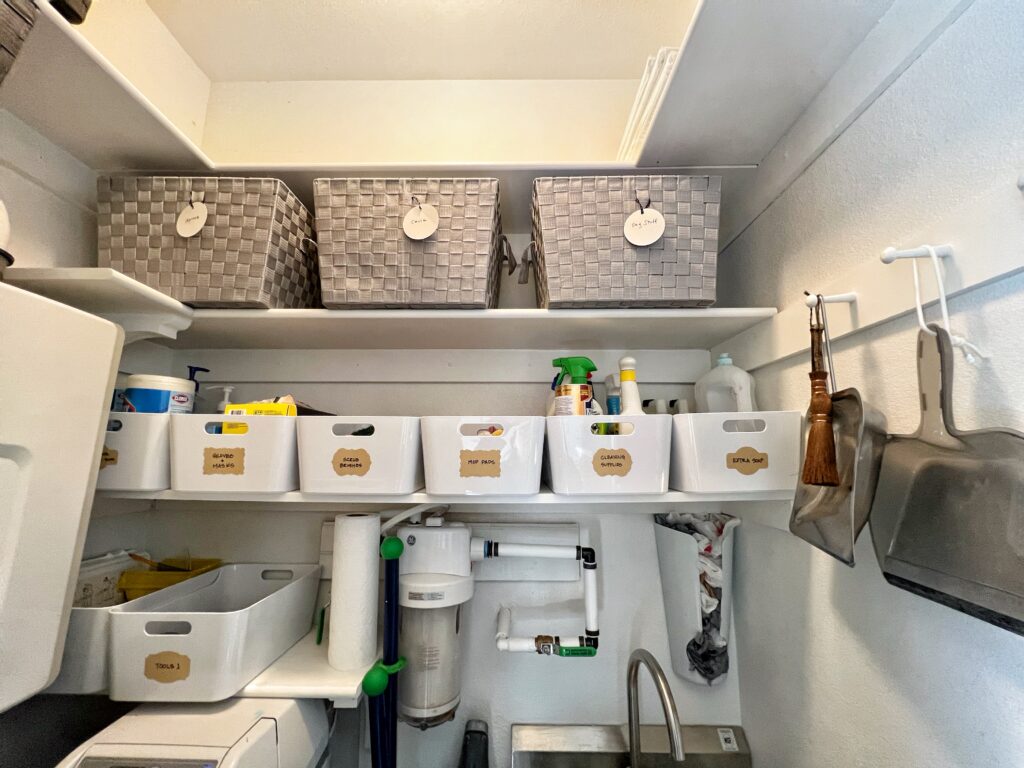
5 1/2 simple tips to Organize and Maximize your Storage in a small closet:
- Look UP: add more shelves above
- Let’s Hang: Utilize the back of the door, hang other awkwardly shaped items that are too long for bins
- Give yourself boundaries: Purge, sort and organize similar items into labeled boxes- LABELING is very important! This will keep you from piling in things that don’t belong into this space.
- Keep the items you need less often up high
- Measure the larger items you need to store, and give them a “home”
5 & a half – Bonus Tip: Keep a step stool handy or IN the space so you have no excuses for not putting things back where they belong.
