Simple Kitchen Upgrade: Raise your cabinets to the ceiling

Raising cabinets means more function, space, and high-end custom look for your kitchen.
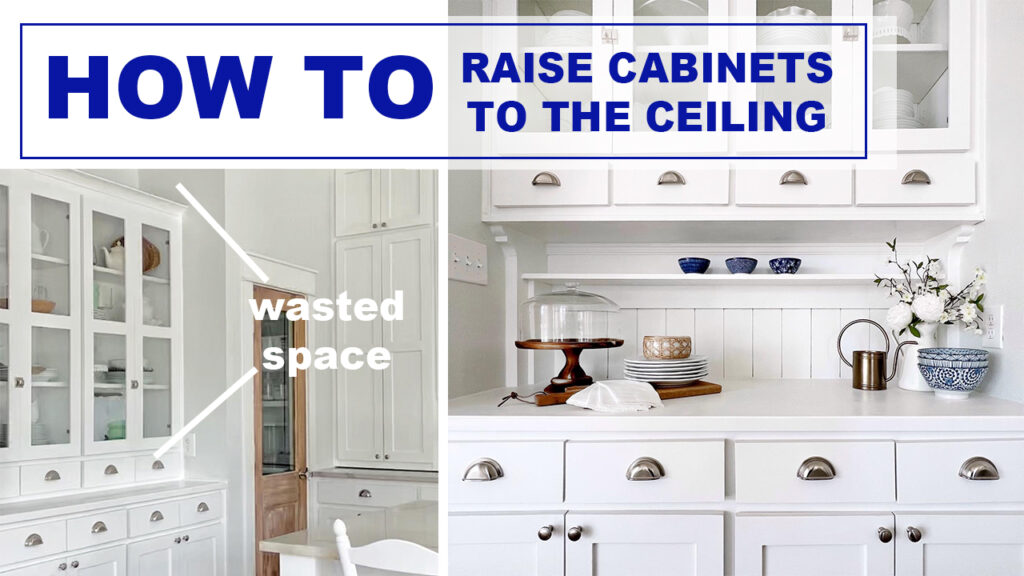
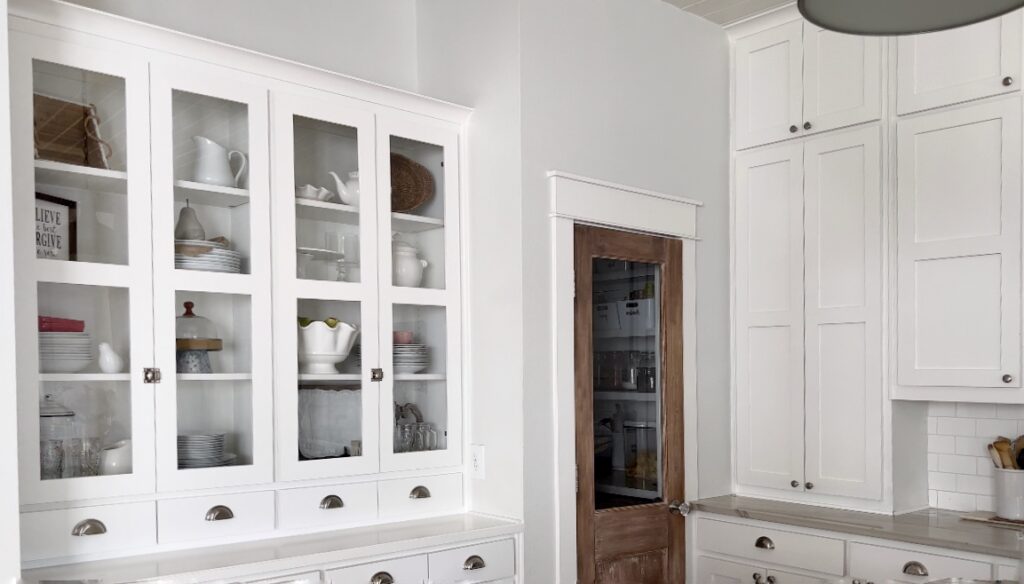
Does it bug you that your kitchen cabinets don’t touch the ceiling?
Maybe you wish you had somewhere in your kitchen for some open shelves?
How to get a custom-looking kitchen with your existing cabinets
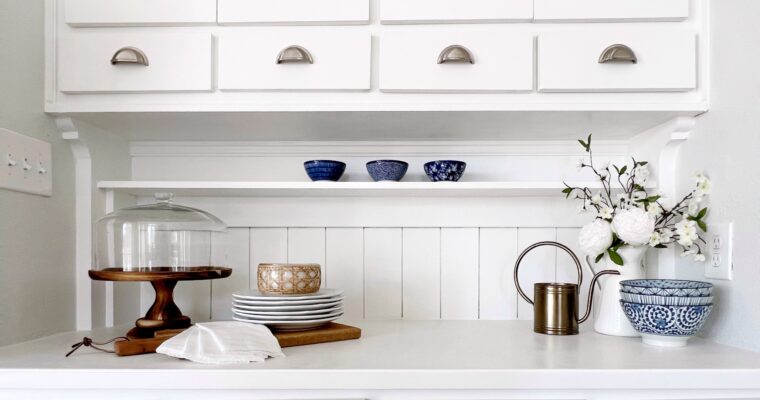
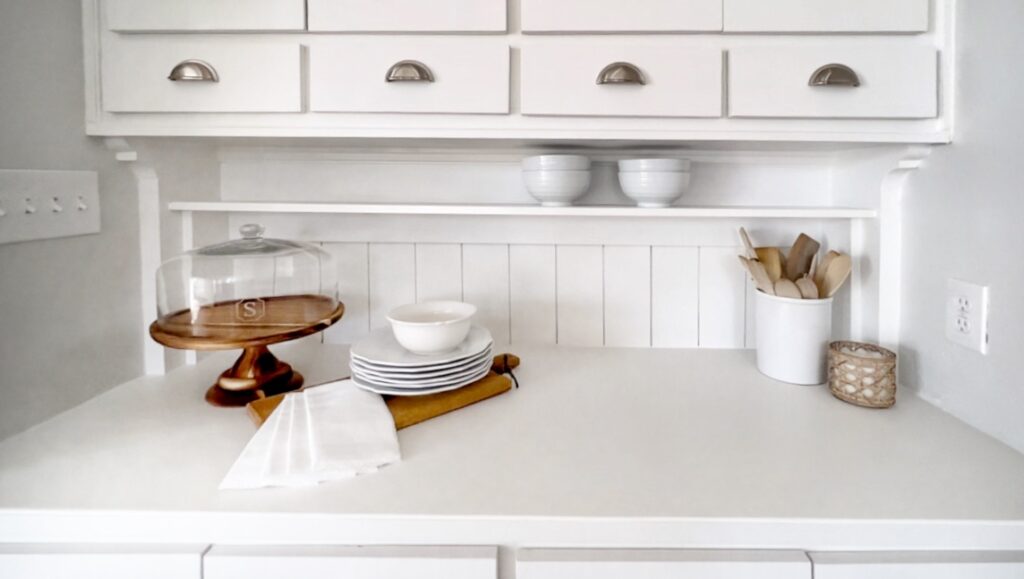
I’ll show you how I raised my hutch cabinet, added a shelf, and doubled my counter space.
Now, you may be thinking you can’t raise your cabinets because then you would have to redo the backsplash.

Here’s a video I made about raising cabinets:
Steps to raising cabinets to the ceiling
- The first step is to remove everything from the cabinets and take off the cabinet doors. In my case, I also removed the drawers.
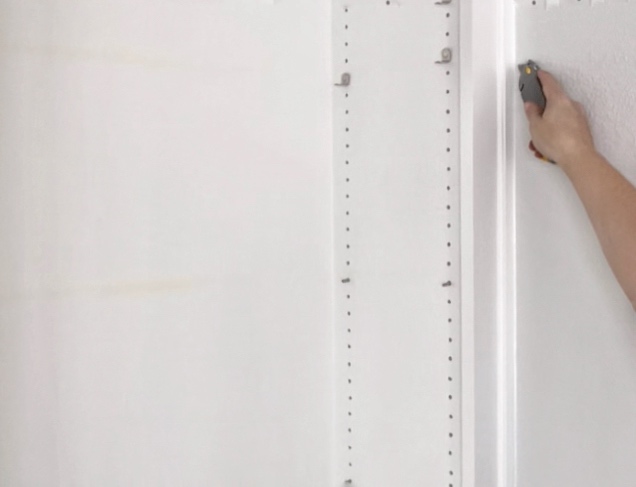
- Next, score the caulked edges with a utility knife.
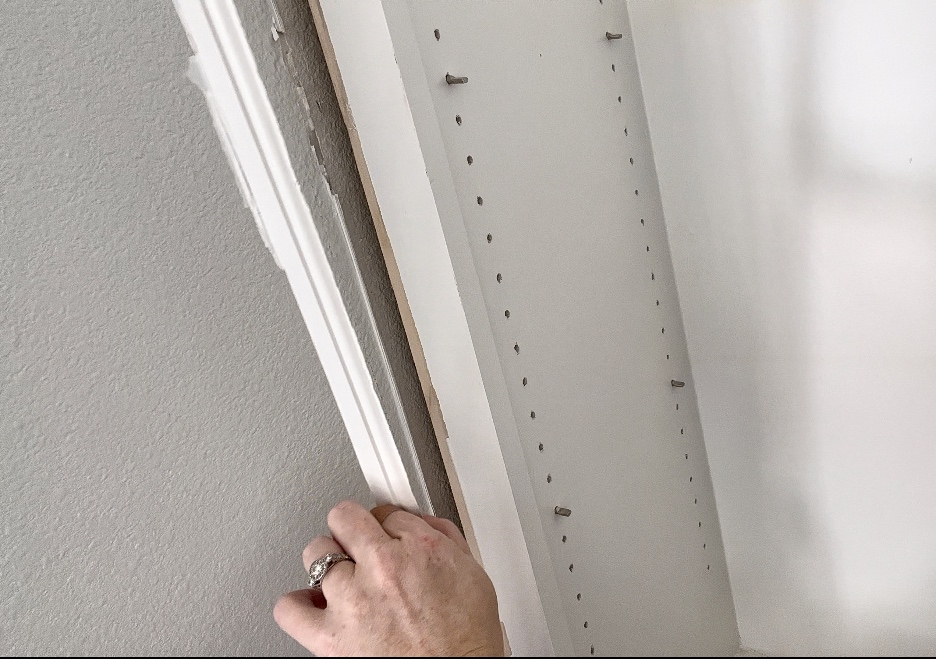
- Remove trim. I used a flat scraper tool and tapped it in between the trim and cabinet using a hammer. Once it is fully separated, you can pry it off easily.
- Locate and remove all screws holding the cabinet in place. Have helpers to support and gently lower the cabinet to the ground. Or if you are ready, they can just lift it to the ceiling to be screwed into a stud up high.
- Add brackets and shelf. If you have an existing backsplash, your shelf will go at the top of the backsplash. You can use wooden corbels (or brackets) like the ones I used in my pantry makeover video which is linked in the top corner, or you could choose a floating shelf style which has no brackets.
- Lastly, add back the trim, caulk cracks and joints, and touch up the paint.
How I made the hutch area look like a cohesive built-in
In this case, I wanted to add some character to the back of my hutch because it has glass doors, and I wanted the whole section of cabinetry to look like a cohesive built-in. Adding vertical planks, will tie it all together and give it some added charm.
I drew on the wall to help me visualize some design ideas. You may see I was (and still am) trying to decide if I should add some shaker pegs to the rail below the shelf. Let me know in the comments if you think I should add the pegs!
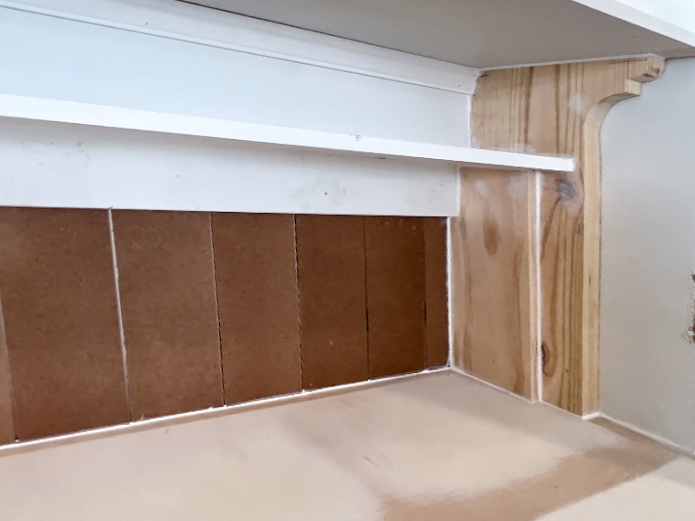
I added the vertical planks to my wall because I didn’t have an existing backsplash here and to help make it look like one big built-in.
Inexpensive faux shiplap
This is a cheap and easy way to create a shiplap look.
I used a 1/8” thick 4’ x 8’ sheet of high-density fiber board. It’s like the stuff peg board is made of but without the holes.
I cut it lengthwise into 5” strips and then cut the strips to the length I needed.
I used construction adhesive and a couple finish nails to attach.
Once painted, you’d never know it’s not ½” thick shiplap.
Making Brackets and shelf supports
I used 2 small scraps of 2×12 and cut a profile into it using a jigsaw.
These go from the top of the counter to the bottom of the now raised cabinet.
Then I used a piece of 1×6 vertically attached to those to support the small shelf below the cabinets.
I made my shelf using 1×8 cut to length.
Designing your shelves
The height between the shelf and the bottom of the cabinet may be different for you and taller than mine. You may even have space for 2 shelves. To find out how much space you’ll have, before you start, measure the distance from your ceiling to the top of the cabinet or top of the trim if you have it.
Keep in mind that your cabinet will be higher up and you’ll probably want to store lesser used items in them, and more often used items on the shelf. If you plan to store plates on your shelf, make sure to make your shelf deep enough to do so.
I plan to store bowls and other small decorative items, so I made mine less deep.
This project could be done in a weekend.
And here are some ways I’ve decorated this area since I finished.

- Simple Ways to Make Your 8′ Ceilings Look Higher
- Why “Boring” Is Better: The Smart Way to Choose Finishes for Your New Build
- The Beauty of Negative Space in Home Design: Simple Elegance of “Less is More”
- Let’s Breakdown How Builders Add Fees on Top of Subcontractor Costs: What Homebuyers Should Know
- Answering Your Home Insulation Questions
[…] अच्छा विचार अधिक स्थान जोड़ें और रसोई में […]
[…] kind of a wonderful idea to include additional area and fascination in a kitchen […]
[…] a great idea to add more space and interest in a […]
[…] kind of a fantastic idea to insert more space and curiosity in a kitchen […]
[…] a great idea to add more space and interest in a […]
[…] sort of a excellent concept to increase far more house and curiosity in a kitchen […]
[…] types of a wonderful concept to incorporate additional room and curiosity in a kitchen […]
[…] kind of a great plan to add far more area and desire in a […]
[…] sort of a great strategy to include a lot more place and interest in a […]
[…] a good thought to increase extra area and interest in a kitchen […]
[…] kind of a excellent thought to add far more room and fascination in a kitchen […]
[…] a fantastic plan to include more area and desire in a kitchen […]
[…] kind of a excellent plan to include more house and interest in a kitchen […]
[…] a excellent strategy to include more space and fascination in a kitchen […]
[…] Simple Kitchen Upgrade: Raise your cabinets to the ceiling How to build a Simple Screened Porch for your Home HOW TO ORGANIZE YOUR PANTRY & ADD CHARM – 11 SIMPLE TIPS […]