How to create a SMOOTH chalkboard wall

We know it looks cool in the home, but did you know that writing on chalkboard walls is really good for kids? This article does a great job explaining!
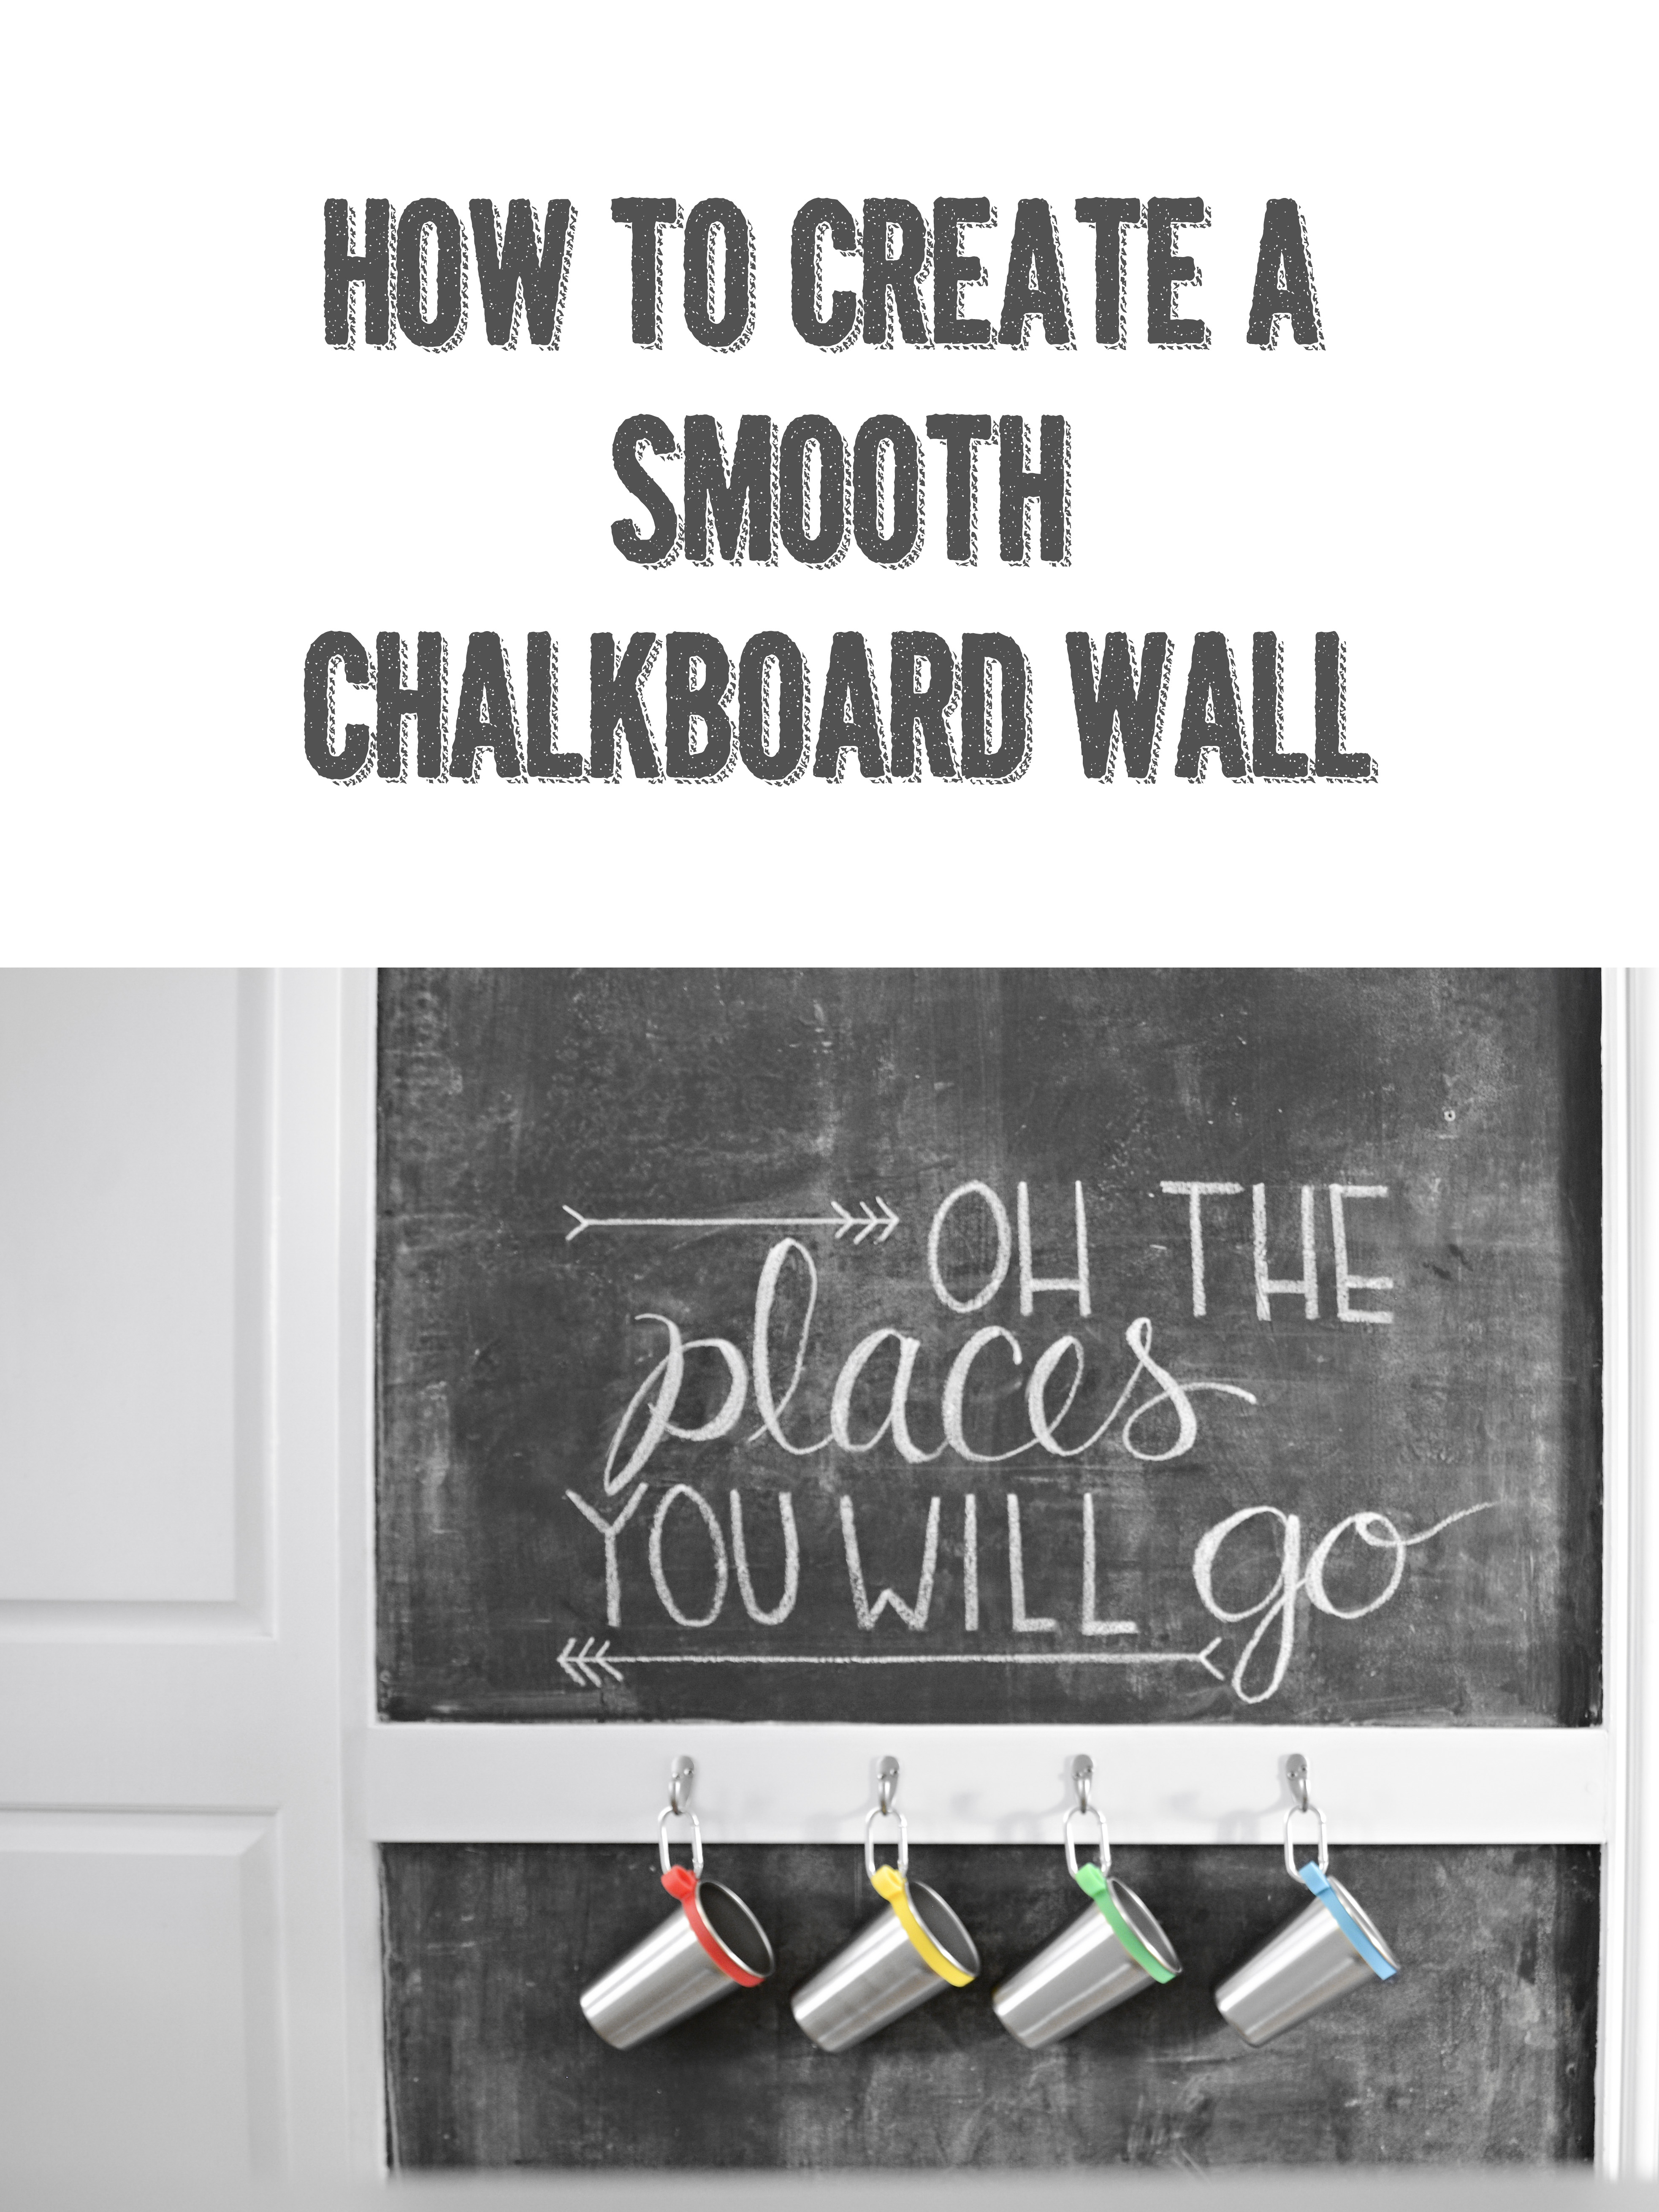
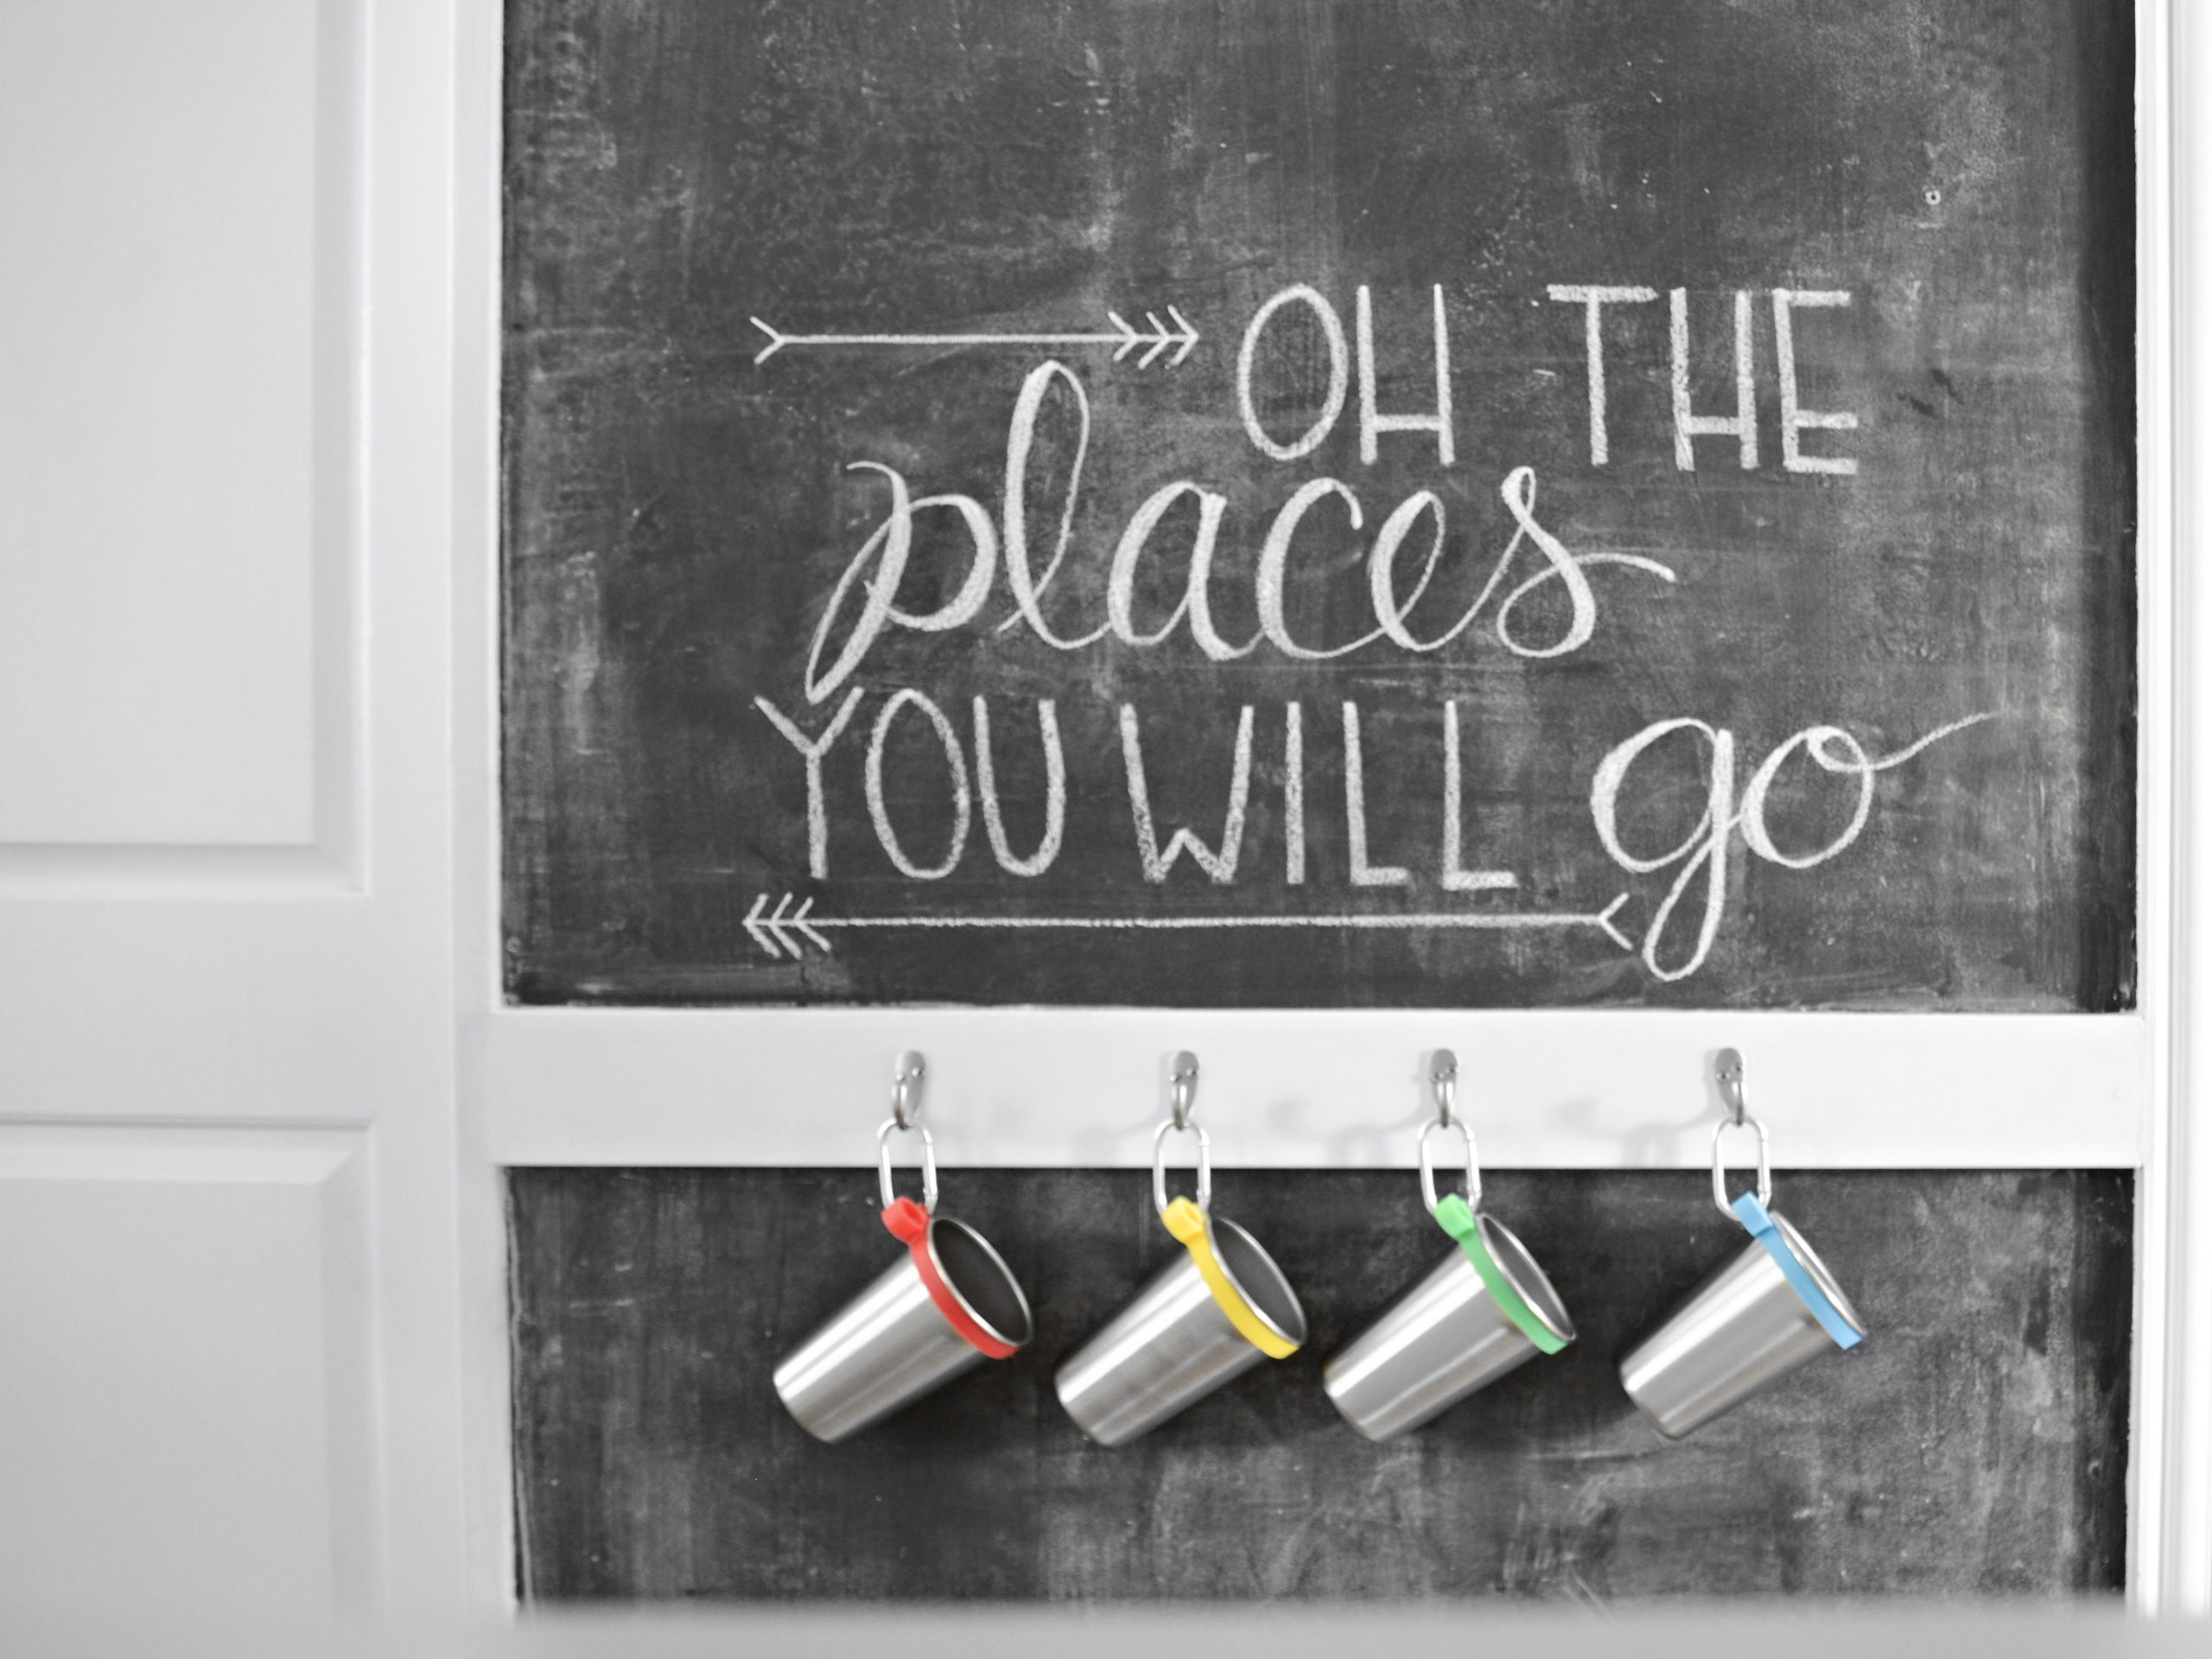
Have you seen chalkboard walls and wished you had one in your home? We did too. So we chose a wall in our kitchen by our pantry and a weekend to get it done. Now that’s it’s done it’s always one of the first things people who come into our home comment on. Our chalkboard wall is one of our favorite things in our home, besides the people, of course.
Here are the supplies necessary and steps to make it happen.
- Rustoleum chalkboard paint
- Masonite sheet (cut to size)
- Primer tinted gray
- Foam roller
- Sanding sponge
- Wood putty
- Putty knife
- Finish nailer (or simply a hammer and finish nails)
- Construction adhesive
- Caulk gun
- Chalk
- Rag
- 1×4 cut to desired length
- 4 metal hooks with screws
- Two 1 1/2″ screws
- power screwdriver
Step 1: Cover and Smooth the Wall
We tried sanding the texture off the wall initially, but it was clear that wasn’t going to be the best way to go. By using a thin sheet of masonite to cover the texture, you’ll create a smooth writing surface.
Cut your masonite to size. (Lowe’s or HomeDepot will cut to size for you.)
Time to hang your panel. For a permanent hold, use construction glue and then secure with finish nails. If you want to be able to remove the panel later, skip the adhesive.
Fill nail holes and seams with wood putty. Lightly sand them smooth after the putty has dried.
Step 2: Prime and Paint
Using a foam roller, prime the chalkboard with tinted primer (ask your paint department to add as much black as they can to a small can of primer.) My Lowe’s store was able to produce a 50% gray color.
After the primer dries, lightly sand it and wipe clean. Then break out the chalkboard paint. You’ll need at least two coats of chalkboard paint. For the smoothest finish, use a foam roller and lightly sand between coats.
Step 3: Season your chalkboard
After the paint has dried thoroughly, enlist the help of your son or daughter to help season the chalkboard. Rub the side of chalk over the entire board. Then wipe it off with a dry rag.
Step 4: Hang the Cup Station (optional)
(We painted ours white to match the trim)
Predrill 2 small holes into the 1×4 where you are going to use screws to attach the board to the wall, where there are studs would be best. Screw the board to the wall through the predrilled holes.
Measure out where you want your hooks so they will be centered and evenly spaced and give your cups room to hang. We put our hooks 6″ apart. This works perfectly with our steel pints!
Now our kids always know where their cup is and they aren’t climbing on the counter for a new cup every 10 minutes! Plus, I can write messages, inspiring quotes and love notes where I know they will see them!
![]()
![]()
![]()
![]()
[…] 11. How to create a SMOOTH chalkboard wall – The Old Barn […]